Working with projects on Cloud Foundry
In this section we will move beyond local applications and take a look using the Boot Dash with remote apps deployed to a cloud runtime.
You can add a Cloud Foundry section to the boot dashboard clicking the big plus icon in the toolbar.
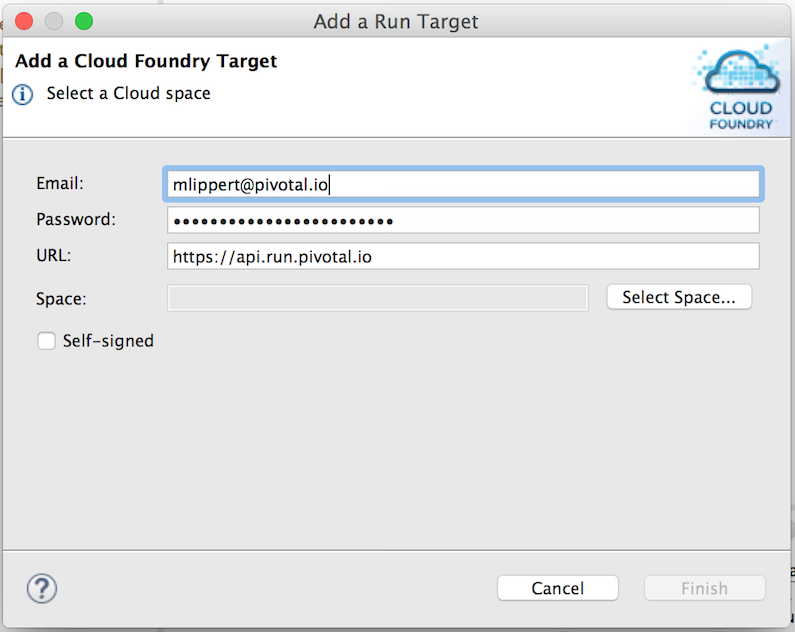
Once you entered your credentials and selected an org/space, a new section will appear in the boot dashboard, listing the apps that are deployed to this space on Cloud Foundry. You can see the name of the app as well as the number of instances that are configured and that are up and running.
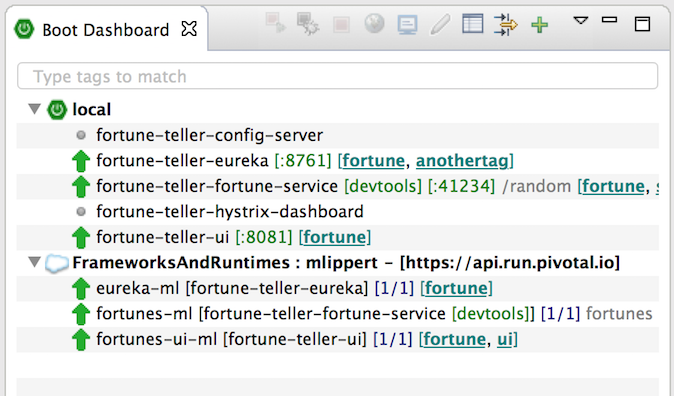
The basic actions work for one or multiple apps on CF in the same or a very similar way to how they work for local apps. You can jump to the console output and it will appear in the console view of STS/Eclipse, you can start and stop apps, you can double-click them to get to a browser window for the running app, you can configure a default path for the app, and you can add/remove tags to/from those apps. You can even execute some of the actions (like start and stop) across targets, if you select multiple entries in the boot dashboard across those target sections.
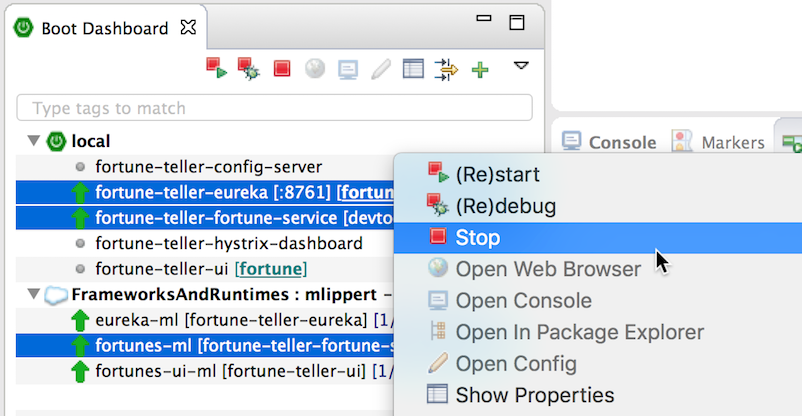
In addition to the common actions that are suitable accross local and Cloud Foundry apps, there are also actions specifically for apps on Cloud Foundry. The boot dashboard allows you, for example, to delete an app entirely from Cloud Foundry, or to easily jump to the web console.

Up to here, we talked about existing apps on Cloud Foundry. But how do you get your apps deployed to Cloud Foundry? There are various ways, for example using the `cf`` CLI or the Concourse Cloudfoundry Resource. The boot dashboard offers you another option: you can drag&drop your Spring Boot application directly onto the Cloud Foundry target in the dashboard and it will deploy the Spring Boot app to CF. This is as easy as its sounds.

After dropping the app on the the CF target, a dialog opens that allows you fill in some details about how you want the app to be deployed.

Most of the properties for the deployment are specified using the standard
Cloudfoundry Manifest format that is also used by the cf push CLI.
The dialog lets you choose between two modes 'manual' and 'file'. With the manual option you are performing a one-time deployment. The properties are entered into the dialog but not saved anywhere after deployment is performed. With the 'file' option you can pick an existing deployment manifest from your workspace and the deployment parameters will be read from that file. In both cases you can edit the parameters in the dialog prior to pressing the OK button to proceed with the deployment.
At the bottom of the dialog is a option to 'Enable JMX Ssh Tunnel'. This tells STS to Activate JMX support in the app and, after the app is deployed successfully, create an ssh tunnel that makes this accessible locally over an SSH tunnel. This feature and its uses are discussed in more detail in this section.
Once the app is deployed, the boot dashboard will keep the association between the project in your workspace and the deployed app on Cloud Foundry (and will show this association in the boot dashboard).

Keeping the association between your workspace project and the app on Cloud Foundry makes changes to this app a lot easier. If you change the code in your workspace and press the (re)start button for the app on CF, the boot dashboard will automatically re-push the app (the changes) to Cloud Foundry.
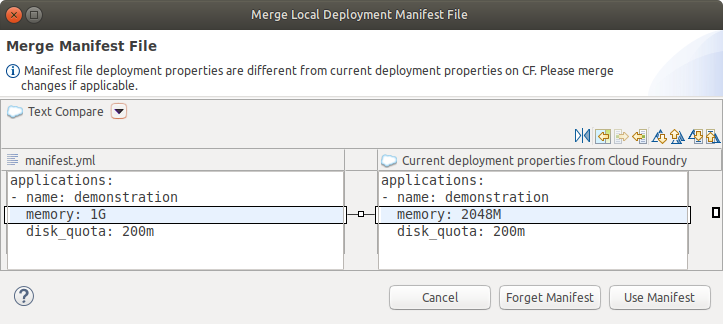
Additionally, for an app deployed via the 'file' option, the contetns of deployment manifest in the file will be compared against the current state of the cloudfoundry deployment to check for discrepancies. This could happen, if either the contents of the file, or the state of the deployment has changed since the last time the app was deployed. If any discrepancies are found, you will be alerted of this via a dialog that highlights the differences. You are given the choice to either abort the deployment; or manually reconcile the differences before proceeding with the deployment.
Once you have deployed your apps on Cloud Foundry, you often don’t need to work on everything locally at the same time. Usually you focus on certain parts of the application and sometimes you would like to use use even both: some services running on Cloud Foundry and some services running on your local machine in your IDE. But how do they interact?
As an early experiment, we built a specific feature into the boot dashboard that lets you use all your services and apps on CF and have them call individual services running on your local machine. That way you can focus on individual projects of your landscape and continue to use Cloud Foundry for the rest of your world. You can quickly iterate and work on the code locally - and test it while working with the other parts on Cloud Foundry.
The way this works is: You have a service discovery mechanism for your microservices in place. At the moment we support the Eureka service discovery service for this feature. You can start your local Spring Boot app using a special action called “(re)start and expose app via ngrok”. Executing this action will (re)start your local app on your machine. At the same time the action will create a public visible tunnel to this app using the ngrok service. As a result, you get a publicly visible URL that routes all its traffic to your local machine and to the local Spring Boot app that is running on your local machine. The app is automatically configured to register with the remote Eureka using this publicly visible tunnel URL.